Wasabi Ball Transfer Appliance
About Wasabi Ball
The Wasabi Ball Transfer Appliance is a 100-TB data transfer solution that lets you move large datasets to Wasabi Hot Cloud Storage quickly, conveniently and cost-effectively. The Wasabi Ball Transfer Appliance is ideal for customers that don’t have sufficient network connection speeds to transfer large amounts of storage over the Internet or private network connections.
Wasabi Ball makes it easy to move terabytes of data to the cloud. Just order one (or more) devices, load it up and return it to Wasabi. Each Wasabi Ball can securely store up to 100 TB of data.
The following sections explain how to move data from your computer to Wasabi Hot Cloud Storage using MSP360 (CloudBerry) Backup and Wasabi Ball Transfer Appliance.
Ordering Wasabi Ball
To order Wasabi ball transfer appliance, email your order to sales@wasabi.com
Backing up Data to Wasabi Ball
Configuring Wasabi Ball
Before using Wasabi ball, perform the following steps:
- Plug Wasabi ball into power.
Note that each Wasabi ball supports the following interfaces:
	<li>Multiple 1 GbE & 10 GbE LAN interfaces supporting DHCP, static, and VLAN IP configurations</li>
	<li>Standard file system interfaces (NFS, CIFS, SMB, FTP, HTTPS)</li>
</ul>

</li>


<li>Choose an appropriate interface, and plug Wasabi ball into your network. </li>

</OL>
For more information on how to configure and use Wasabi ball, refer to Wasabi documentation.
Backing up Data Using Wasabi Interface
After connecting the Wasabi Ball Transfer Appliance to your local network, you can load it up using a simple built-in interface. Your data is encrypted automatically.
Creating a Backup Plan for Wasabi Ball
Alternatively you can add Wasabi ball as a network storage, and then create a backup plan to back up data to that storage.
To add Wasabi ball as a network storage
- Run the application.
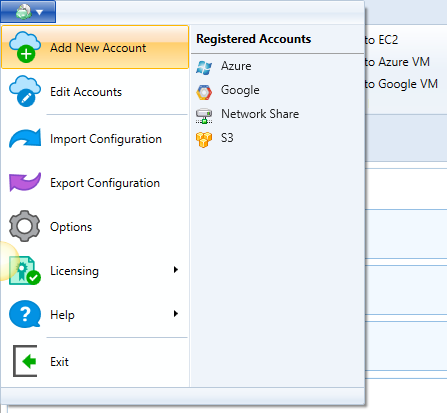
- Open the application menu, and then click Add New Account.
In the Select Cloud Storage dialog box, select File System.
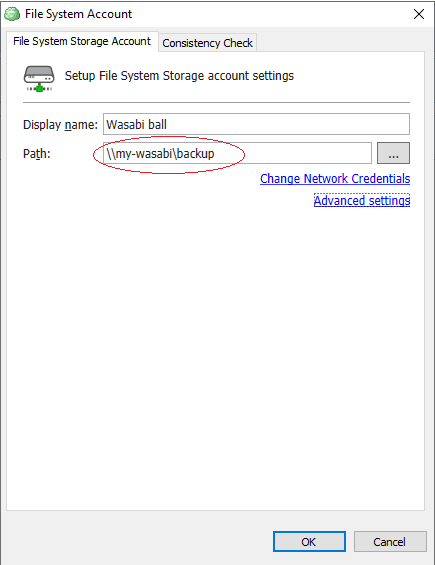
In the File System Account dialog box, in the Display Name field, specify the storage name, and in the Path field, specify the path to the connected Wasabi ball :
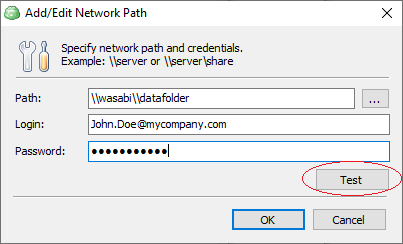
- If an access to Wasabi ball requires authentication, click Change Network Credentials, and then complete the Add/Edit Network Path dialog box that opens:
- Create and run the backup plan that uses the newly created account.
Shipping Wasabi Ball back to Wasabi
Return the loaded Wasabi Ball Transfer Appliance to Wasabi.
After receiving the Wasabi Ball Transfer Appliance, Wasabi will upload your data to your Wasabi storage bucket(s), notify you and securely erase the Wasabi ball.
Sync Repository
After receiving a notification that your data has been moved to Wasabi Hot Cloud Storage, you should perform a repository sync.
MSP360 (CloudBerry) Backup does not recognize what files are in the cloud because the app tracks uploaded files with a local database called repository. This database only contains records about the files that had been uploaded to Wasabi Hot Cloud Storage with a regular backup plan. At the same time, an information about the files uploaded using Wasabi ball is not in the repository yet and can be retrieved from the cloud by performing the repository sync.
Once the repository is synced, the initial backup with the help of Wasabi ball is considered to be complete. All future backups will be performed as usual from your computer to Wasabi Hot Cloud Storage by means of MSP360 (CloudBerry) Backup.
For more information, see Support of Wasabi Storage blog article.