Hyper-V Virtual Machine Backup
Backup for Windows VM edition supports backup and restore of Hyper-V Virtual Machines and Hyper-V Failover Clusters created and managed by Microsoft Hyper-V server.
It is enough to install the instance of Backup for Windows VM Edition on one of Hyper-V hosts in case of a present cluster
To learn about Hyper-V backup and restore: how they work, system requirements and limitations, refer to the About Hyper-V Backup. Learn more about the Hyper-V Failover Cluster backup in the Hyper-V Failover Cluster Backup chapter
The following requirements apply to Hyper-V backup:
| Component | Requirement |
|---|---|
| Operating System | Windows 8 and 8.1 Enterprise or Pro editions, Windows 10 Enterprise or Pro editions, Windows 11 Pro, Windows Server 2008 R2/2012/2012 R2/2016/2019 with Hyper-V role |
| MSP360 (CloudBerry) Backup | VM Edition |
This chapter cover the following topics:
Create Backup Plan
To create a new Hyper-V backup plan, expand the Hyper-V menu in the horizontal menu bar and select one of the available formats: to create the backup plan in the new backup format, select the Hyper-V item. To use legacy Hyper-V backup, select the Hyper-V Backup (Legacy) item.
The Create Hyper-V Backup Plan Wizard starts.
Learn Backup Wizard steps:
- Select Backup Storage
- Plan Name
- Connect to a Hyper-V Cluster
- Select Virtual Machines
- Select Virtual Disks
- Compression and Encryption Options
- Consistency Check and Restore Verification
- Schedule
- Retention Policy
- Pre / Post Actions
- Notifications and Logging
Select Backup Storage
Select a storage account for the backup plan from the list of available backup storages. If no storage are available, click Add new Storage Account.

Click Next.
Plan Name
Specify the name for the backup plan.

Click Next.
| Previous Step | Top | Next Step |
Connect to a Hyper-V Cluster
This step appears in the backup wizard only if a Hyper-V cluster is present and detected
Select whether to back up a local Hyper-V host only or a Hyper-V cluster.
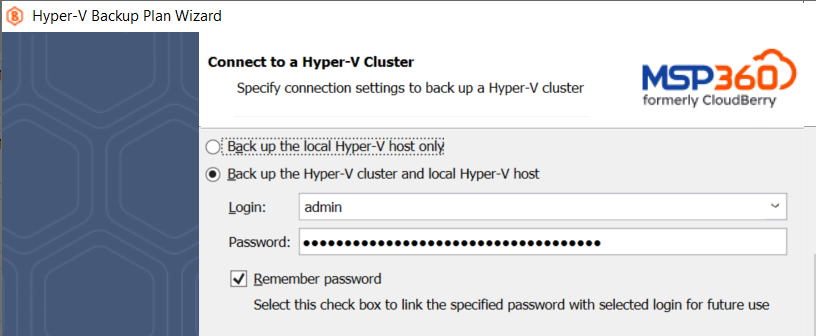
The following options are available:
- Select the Back up the local Hyper-V host only option to back up a local Hyper-V host
- Select the Back up the Hyper-V cluster and local Hyper-V host option to back up VMs of a Hyper-V Failover Cluster, then specify the cluster access credentials.
Click Next.
| Top |
Select Virtual Machines
Configure the backup dataset for the plan and select the virtual machines to back up.
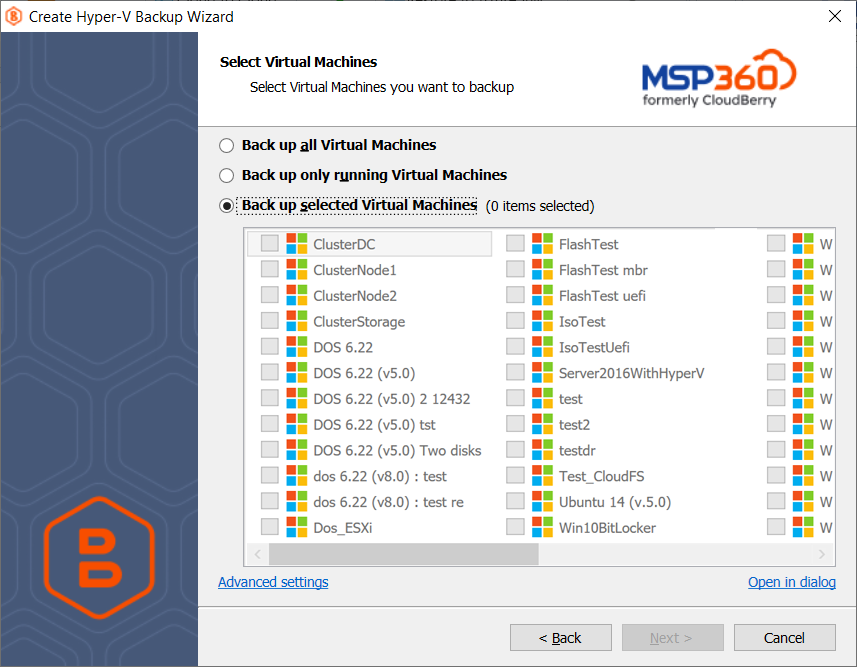
The following options are available:
- Back up all Virtual Machines. Select this option to include all virtual machines of the Hyper-V server to the backup plan
- Back up only running Virtual Machines. Select this option to include running virtual machines of the Hyper-V server to the backup plan
- Back up selected Virtual Machines. Select this option to include specified virtual machines of the Hyper-V server to the backup plan.
Note that if you switch the backup option from the Back up selected Virtual Machines to any other, the previously made selection is kept for the case if you change your mind and select back the Back up selected Virtual Machines option, but the selected option will be applied regardless the virtual machine selection.
As of version 7.4, you can customize checkpoints to back up. To configure the checkpoint backup, click Advanced Settings. Select Back up current Hyper-V checkpoint only check box to back up the latest checkpoint only. Otherwise all existing checkpoints for the selected virtual machines will be backed up.
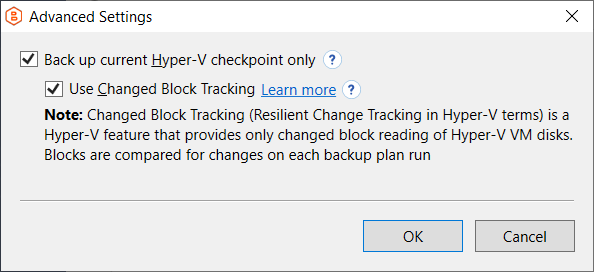
Along with the Back up current Hyper-V checkpoint only option, you can enable the Changed Block Tracking (Resilient Change Tracking) feature. Read more about the Changed Block Tracking in the Changed Block Tracking for Hyper-V paragraph.
Click Next.
| Top |
Configure Application-Consistent Backups
You can configure the application processing settings on the Select Virtual Machines step of the Hyper-V backup wizard.

By default, the Try application processing setting is set. Click on the setting to change it, if necessary.
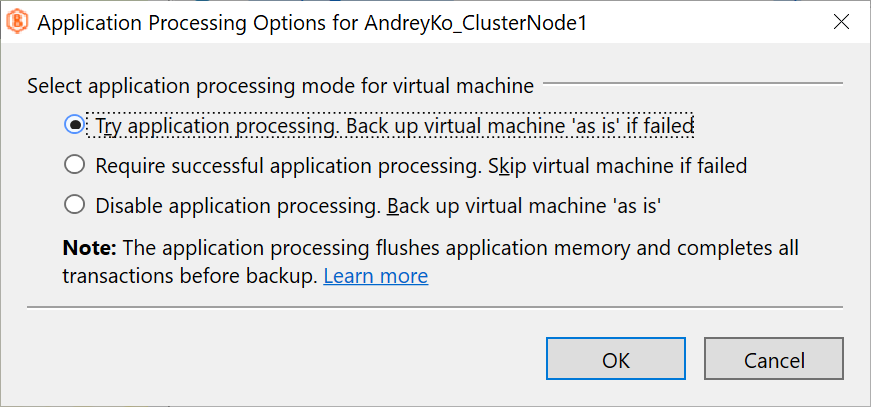
The following options are available:
- Try application processing. Back up virtual machines 'as is' if failed. Once this option is selected, virtual machines are backed up one by one. Using the installed VMware Tools, the state of applications running on virtual machines is checked, then a snapshot is made and an application-consistent backup is performed. In case an application-consistent snapshot is not made for some reason, a regular snapshot is done for this virtual machine.
- Require successful application processing. Skip virtual machines if failed. Once this option is selected, virtual machines with applications that did not flush pending I/O operations from memory to disks, are skipped and an appropriate warning is displayed for a user.
- Disable application processing. Back up virtual machines 'as is'. Once this option is selected, regular VM snapshots are done without quiescing.
Click Next.
| Top |
Select Virtual Disks
If you selected the Back up selected Virtual Machines option on the previous step, you can select required disks of selected virtual machines.
- To back up all virtual machine disks, select Backup all disks option.
- To select particular VM disks for the backup plan, select Backup selected disks only option. Use the tree to expand or collapse virtual machine items.
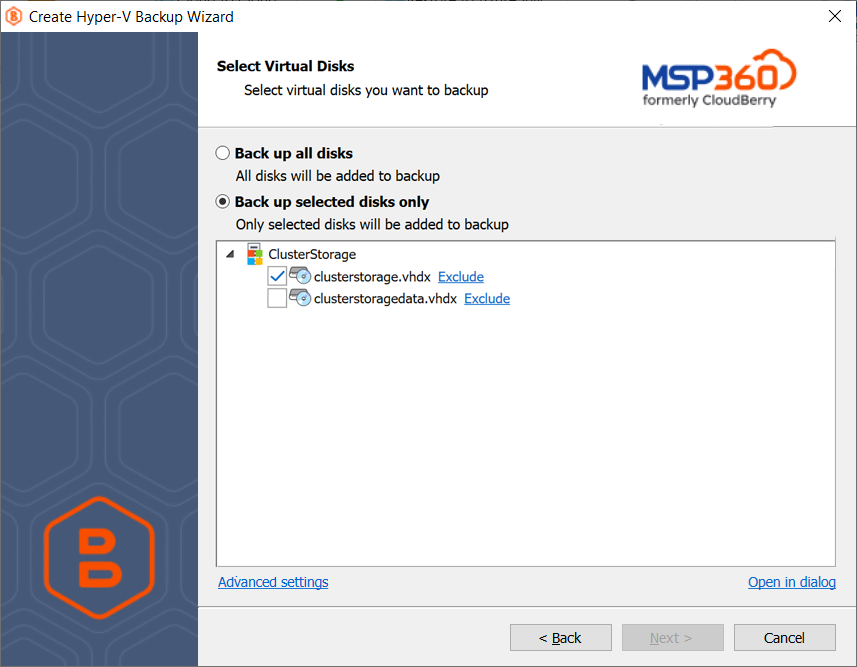
You can expand selected NTFS disks to exclude some objects. Non-NTFS disks can only be included or excluded as a whole.
Click Next.
| Top |
Compression and Encryption Options
Specify compression and encryption options for the backup plan.
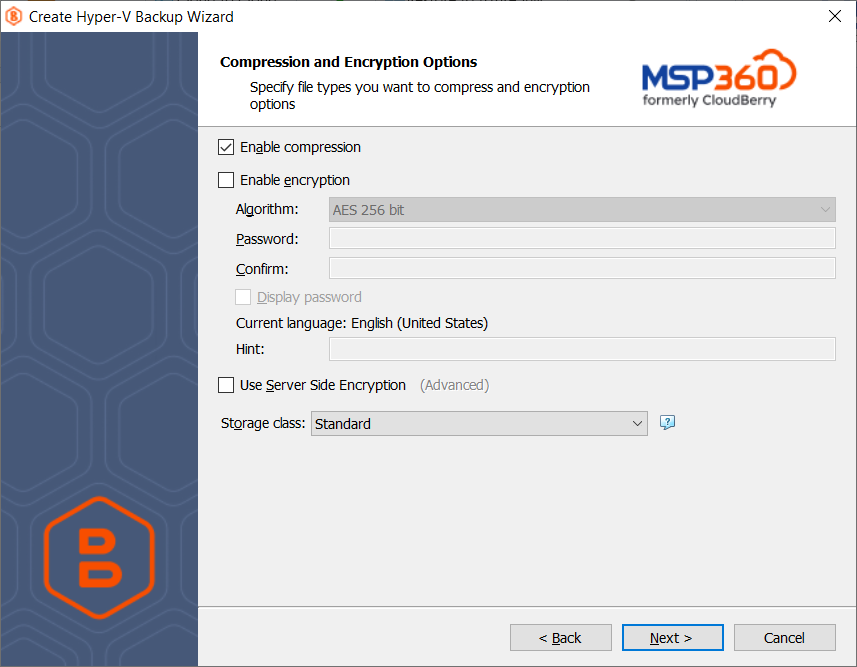
The following options are available:
- Select Enable compression check box to compress backup source contents for optimal backup storage space usage
- To protect your backup contents with encryption, select Enable encryption check box. MSP360 (CloudBerry) Backup supports AES encryption of 128, 192 and 256 bit key length. Select the appropriate key length in Algorithm drop-down menu
- Specify the encryption password in Password field, then confirm the password in the Confirm field. To display password, select Display password check box
Note that the encryption password will NOT be stored in the backup plan configuration for security reasons. Keep this password in a safe place to be able to restore the backup contents afterwards
| Top |
Consistency Check
Enable the full consistency check if required.
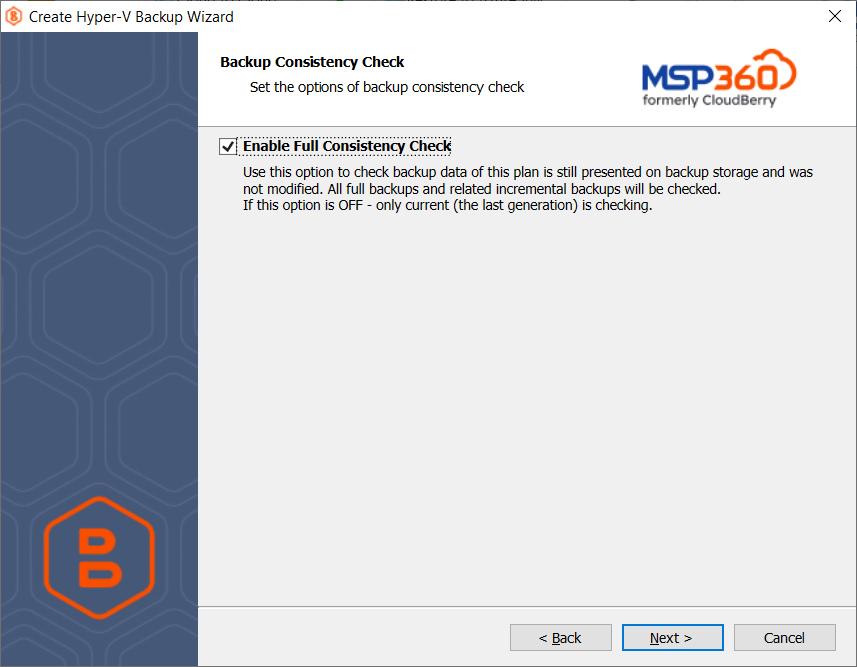
To learn more about consistency checks, refer to the Consistency Checks chapter
Click Next.
| Top |
Schedule
Specify the backup plan schedule settings.
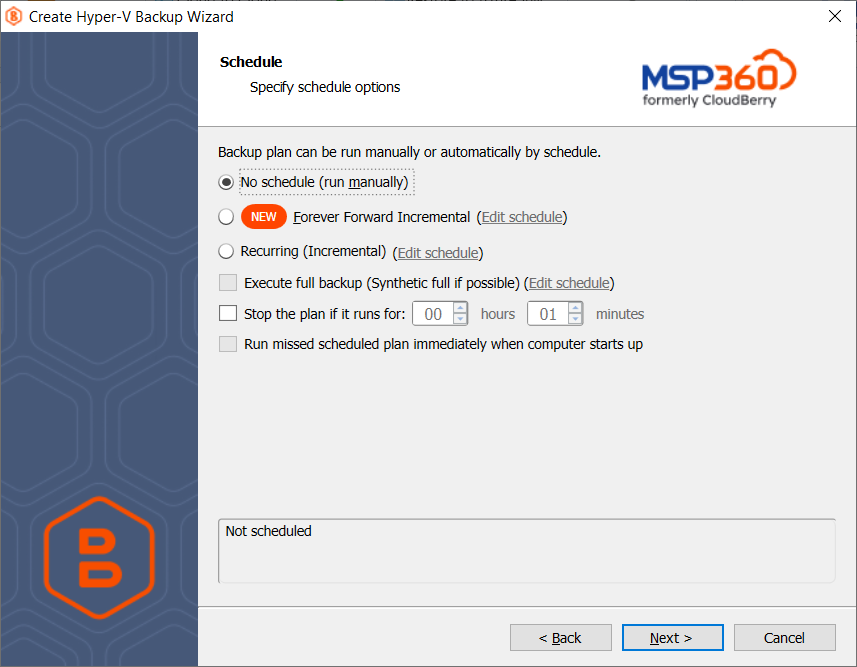
The following options are available:
- If you intend to run the backup plan manually, select No schedule option
- If you intend the backup plan to run on a particular date and time, select Specific date option, then specify the date and time you want your backup plan to be run
- Select the Forever Forward Incremental option to apply the Forever Forward Incremental (FFI) schedule
Once you select this option, specify the FFI schedule for the backup plan:
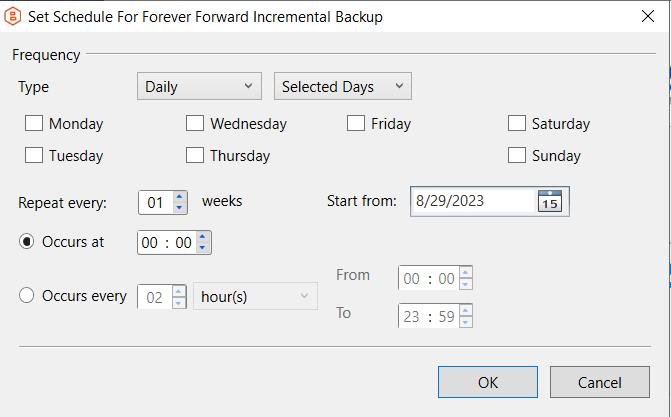
- If you want the backup plan to run on a constant periodic basis, select Recurring (Incremental) option
- To stop the backup plan in case if it continues suspiciously long, select Stop the plan if it runs for check box, then specify the backup plan maximum duration
Recurring (Incremental) Schedule
The Schedule Recurring Options dialog help you to configure backup frequency:
The following schedule options are available:
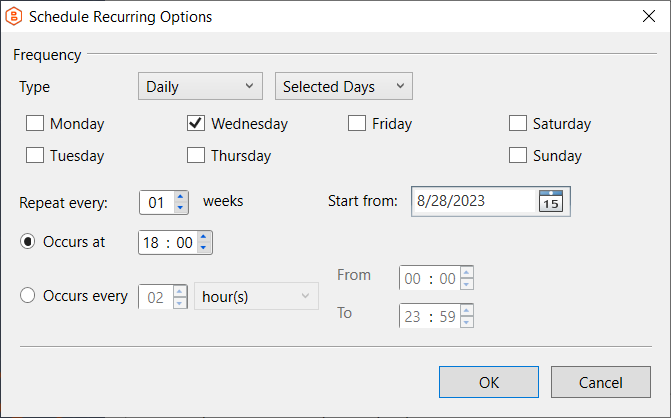
The Repeat Every option allows configuring flexible schedule according to your requirements. The example on the drawings shows the incremental backups schedule executed every week on Wednesdays starting from 30 March, 2022 or every 3 months starting from 30 March, 2022. You can create a schedule with multiple days of week and specify the desired period measured in weeks or months.
- To create full backups by schedule, select the Execute full backup (Synthetic full if possible) check box, then configure the schedule for full backups
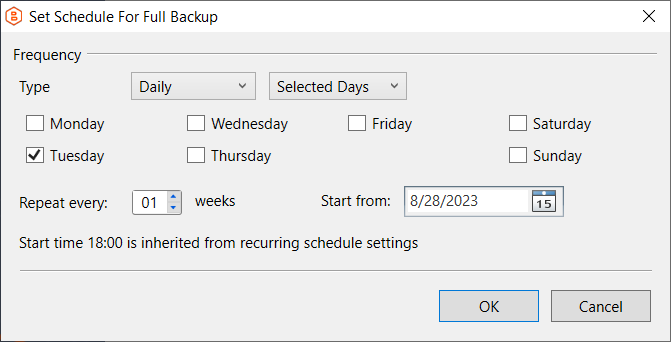
- To set the time limit for plan execution, select Stop the plan if it runs for check box, then specify the backup plan duration limit
- To run the backup plan after the computer is on in case the backup plan run has been missed, select Run missed scheduled backup immediately when computer starts up check box
Click Next.
Top |
Retention Policy, GFS and Immutability
Specify the retention policy settings for the backup plan.
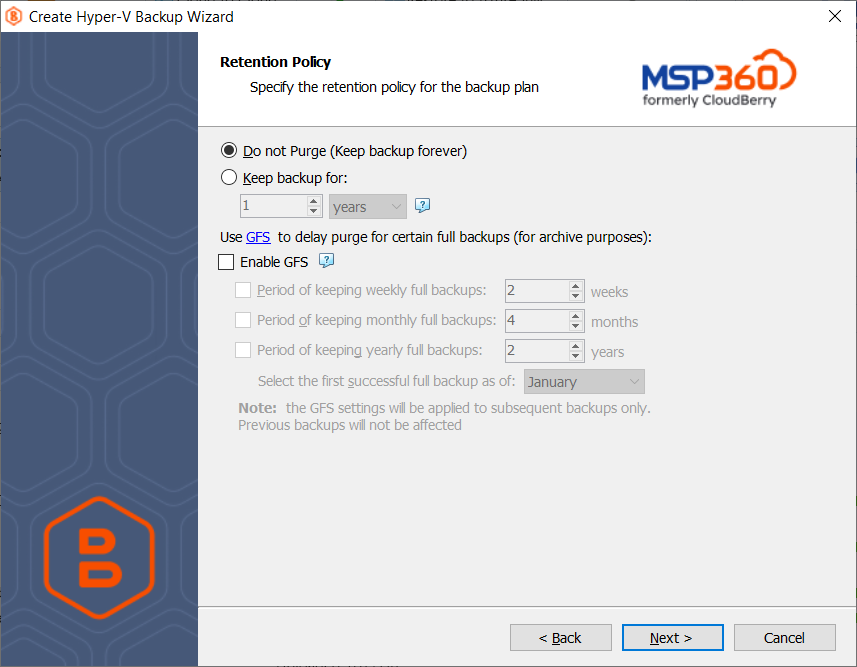
The following options are available:
- Do not purge. Select this option to keep all your backup runs
- Keep backup for. Select this option to limit the period while backup contents are kept in the backup storage, then specify the period
Learn more about the retention policy in the Retention Policy chapter chapter
To apply the GFS retention policy for the backup plan, select the Enable GFS check box, then customize the GFS retention policy by enabling the required keeping periods (weekly, monthly and yearly purge delays).
To learn more about the GFS retention policy, refer to the About GFS chapter
If backup data is required to be locked, enable the Immutability check box.
To learn more about the Immutability feature, refer to the Immutability chapter
Click Next.
| Top |
Pre / Post Actions
Customize actions before and/or after the backup plan run.
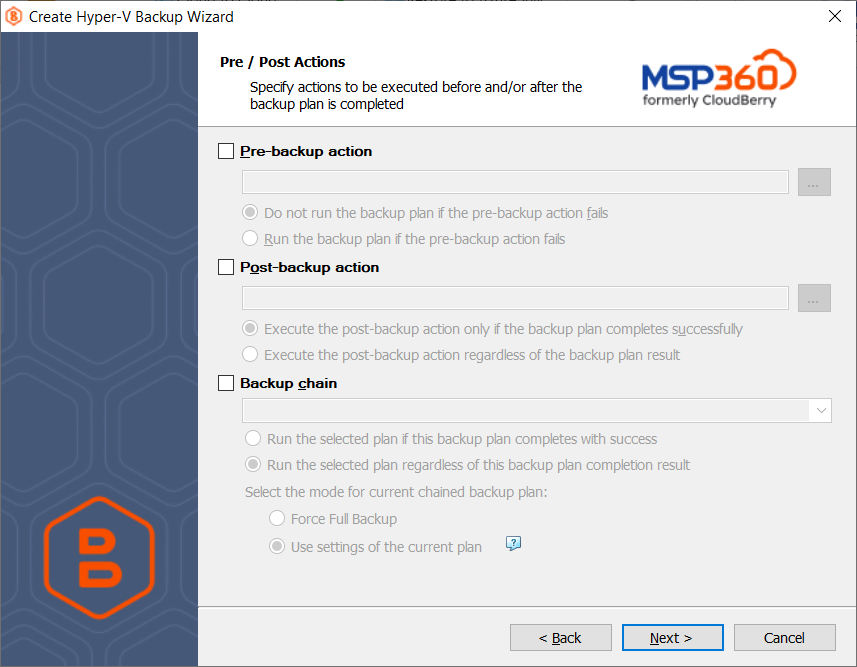
Custom Scripts
You can execute custom scripts before or after running the backup plan.
- To specify the script execution before the backup plan starts, select the Pre-backup action check box, then specify the path to the script in the field below. To open a standard Windows dialog box, click the ... button
- Select the pre-backup script execution options:
- Exit backup plan if pre-backup action failed. Select this option to cancel the backup plan in case the specified script fails
- Continue backup plan if pre-backup action failed. Select this option to run the backup plan regardless the specified script execution results
- To specify the script execution after the backup plan terminates, select the Post-backup action check box, then specify the path to the script in the field below. To open a standard Windows dialog box, click the ... button
- Select the post-backup script execution options:
- Execute post-backup action only if backup plan has been successfully completed. Select this option to execute the post-backup script only in case of a backup plan success
- Execute post-backup action regardless of the backup result. Select this option to execute the post-backup script in any case
Note that an absolute path to a script is required, i.e. if you specify the path to a script, it should be as follows:
c:\scripts\prebackup-script.bat
In case the absolute path to a script file is not specified, the default directory for script is "C:\Windows\System32"
The following script formats are supported: EXE, COM, BAT, CMD, or PIF
Mind that MSP360 (CloudBerry) Backup supports EXE files have several restrictions: EXE files must not use GUI and must close automatically upon termination.
For example, the following script will not succeed:
cmd.exe /F:ON
In this case, this command must be used with the /C parameter, as shown below:
cmd.exe /F:ON /C
The same restriction applies to applications executed by PowerShell scripts:
PowerShell.exe Start-Process cmd.exe exit
It is highly recommended to perform a test run for the created backup plan to ensure that MSP360 (CloudBerry) Backup properly executes specified scripts
Backup Plan Chains
In case you need to run another backup or restore plan once the backup plan is finished, use the Backup Chain feature. To create a backup chain, select the Backup chain check box, then select a backup or restore plan to be chained.
- Execute the specified backup plan only if backup plan has been successfully completed. Select this option to execute the chained backup plan only in case of a backup plan success
- Execute the specified backup plan regardless of the backup result. Select this option to execute the chained backup plan in any case
- In case you chained a backup plan, you can enable the full backup for it regardless the contents in the backup storage. To do this, select the Force full backup for the chained plan.
To learn more about the full backup type, refer to the Full Backup chapter
Click Next.
| Top |
Notifications and Logging
Specify notification and logging settings.
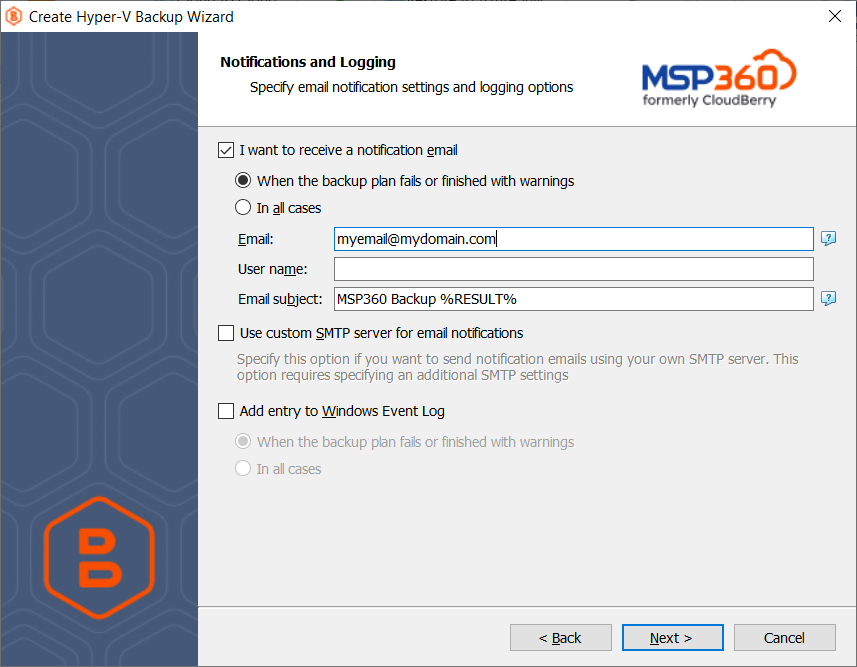
- To receive the notification after the backup plan completion, select I want to receive notification email check box.
- Select When backup fails or finished with warnings option if you want to receive the notification message in case of the backup plan failure or in case of some warnings
- Select In all cases option if you want to receive the notification message in any case.
- In the fields Email, Use name, Email subject specify the notification email details. You can specify one or more email recipients. Separate them by semicolon or comma, the recipient name (one for all of them). The email subject that can also contain any of the following variables:
- %COMPUTER_NAME%. Displays the instance name on which the backup plan was executed
- %RESULT%. Displays the result of the backup plan. Possible values: Success, Finished with warnings, Failed
- %PLAN_NAME%. Displays the name of the backup plan.
- If you want to use own SMPT server for notification emails, select the Use custom SMTP server for email notifications check box, then specify the settings for the SMTP server
- If you want the backup plan record to be added to Windows Event Log, select on Add entry to Windows Event Log when backup completes check box
- Select When backup fails or finished with warnings option if you want to receive the notification message in case of the backup plan failure or in case of some warnings
- Select In all cases option if you want the entry to be put in Windows Event Log in any case.
Click Next.
| Previous Step | Top | Next Step |
Edit a Backup Plan
To edit the backup plan, proceed as follows:
- Switch to the Backup Plans tab.
- Open the plan to edit, expand it, then click Edit.

- Follow the Backup Wizard steps to save the backup plan configuration.
Delete a Backup Plan
To delete the backup plan, proceed as follows:
- Switch to the Backup Plans tab.
- Open the plan to delete, expand it, then click Delete.

- Click Yes to confirm the backup plan deletion.

